





How to write docs
Contents
This guide explains how to write and structure your tool's documentation. A tool is a PostHog capability like support, error tracking, or product analytics. We used to call these "products" or "apps".
The structure in this guide shows users how a tool feeds self-driving, so it follows PostHog's four layers:
- Tools are what you document.
- Products are the surfaces a tool runs on – Web, Slack, MCP, PostHog Code. That's the Surfaces section.
- Context is the data that feeds the tool and the self-driving loop. That's the Context section.
If the terminology here is confusing at all, check out the glossary.
The structrure outlined in this guide is intended for tool-specific docs. Some docs, like API and SDK references, won't fit nicely in this box. That's okay. Refer to the other Wizard & Docs handbook pages for how to write onboarding, SDK, and API docs.
Docs categories
We've created a standard, flexible structure for tool docs. Each section groups pages that serve a distinct purpose in the developer journey.
Every docs page should fit into one of the following categories:
- Overview – The landing page for your tool's docs. Think of it as a one-pager for your tool.
- Get started – The minimal steps and context needed to get your tool up and running.
- Surfaces – Where and how people use your tool, across each product (surface) it runs on: the web app, Slack, MCP, PostHog Code. Every tool runs on at least one.
- Context – The data that feeds your tool, and where it comes from.
- Resources – Standalone "lookup" pages like pricing, troubleshooting, and references.
We recommend using Support docs as a reference. They're the clearest example of this structure, so they're a good template when writing docs for a new tool or improving an existing one.

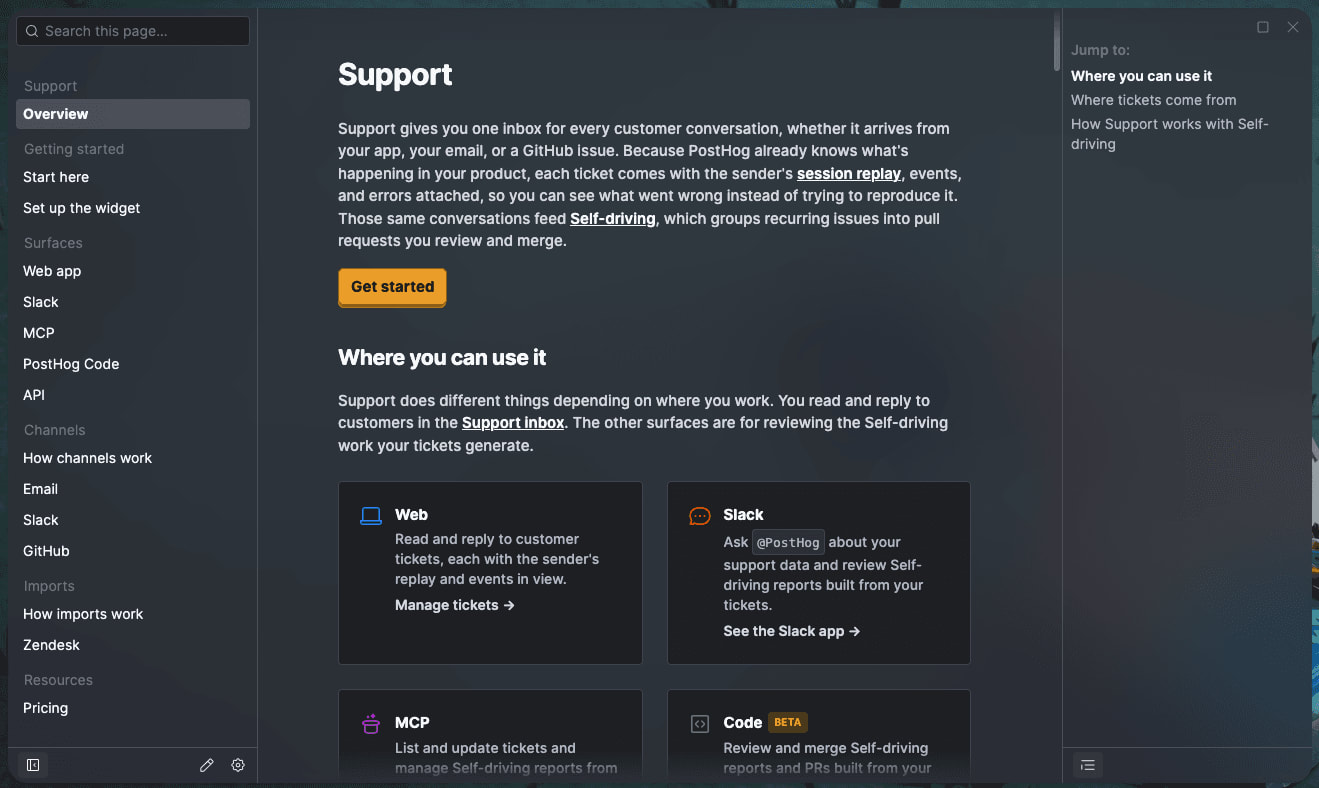
PostHog has a wide variety of tools. For example, Data Pipelines is integration heavy while PostHog AI and Workflows are UI-oriented. They require different content structures for their docs, so adapt this structure to your tool's needs.
That said, stick to this structure first. It’s worked well for other tools, both in terms of docs-to-adoption conversion and user feedback, so it’s proven to be effective.
Sidebar navigation
The sidebar navigation mirrors the docs structure. The hierarchy drives how users discover and navigate docs. Here's how it looks for Support, our reference example:
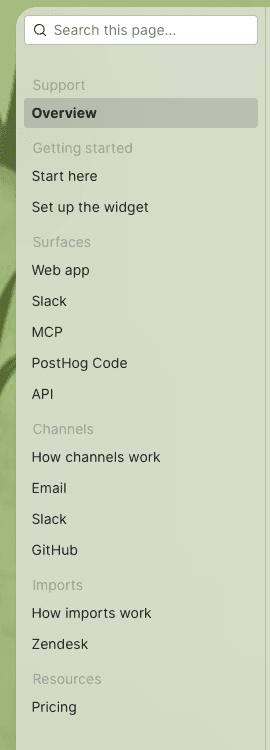
Support fills the Context role with two top-level sections – Channels and Imports – because each is distinct enough to stand on its own. Your tool might need only one context section, or might name it something else. Ordering and grouping are controlled by array position and header-only nodes in src/navs/index.js.
Overview
This is your tool's book cover – a busy engineer scanning it should learn in seconds what it is, where they use it, where its data comes from, and how it feeds Self-driving.
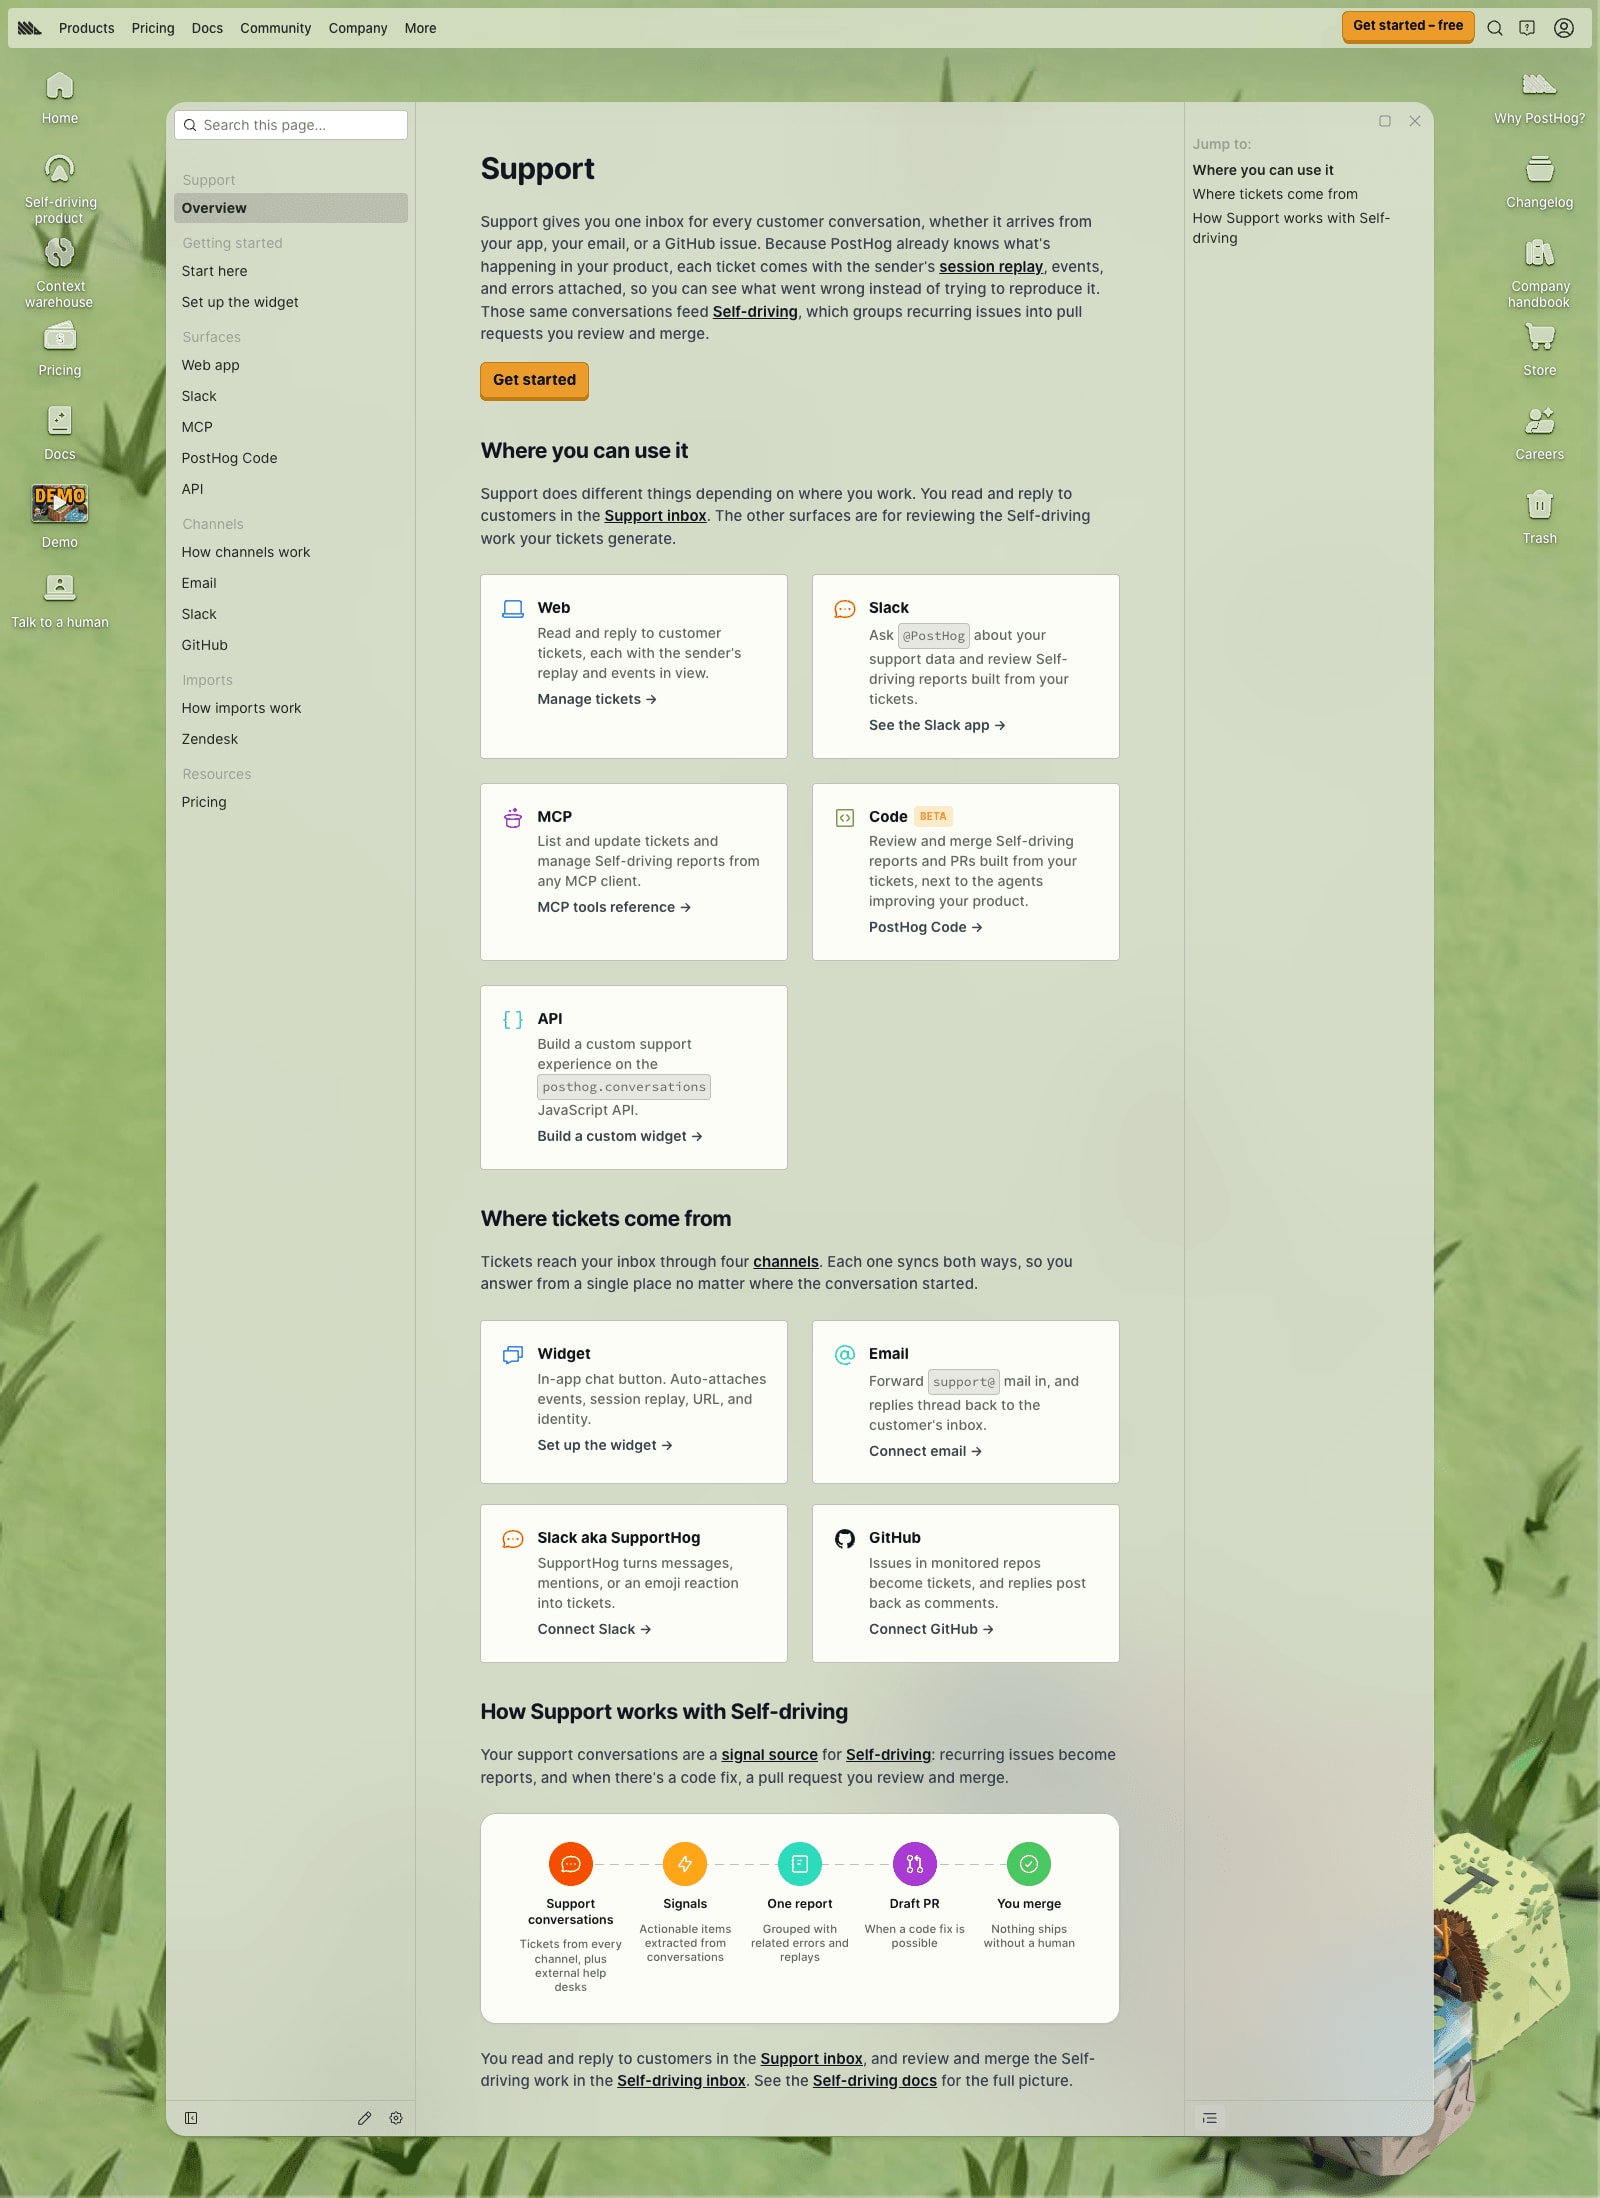
Include the following on this page, keeping it straightforward and concise. No walls of text:
- Description + value proposition
- Where you can use it – a card grid of surfaces
- Where its data comes from – a card grid of context (data sources)
- How it works with Self-driving – the
CustomSelfDrivingLoopdiagram, customized for your loop - CTAs for next steps
- Scannable visual components
Example: Support overview
Get started
Get started is a category, not a page. It groups the pages that get new users up and running as quickly as possible, with just enough context to understand what's going on. Those pages are:
- A Start here page
- An Install or setup page (if your tool needs one)
Keep advanced or complex features out of these pages. Those belong on the relevant surface or context page.
Start here
A high-level map of the adoption journey – the milestones to succeed with your tool, like a video game's quest log. It acts as a syllabus: users invest more when they can see what they're signing up for. These are high-converting pages for paid ads, so they matter. Build it with the QuestLog component.
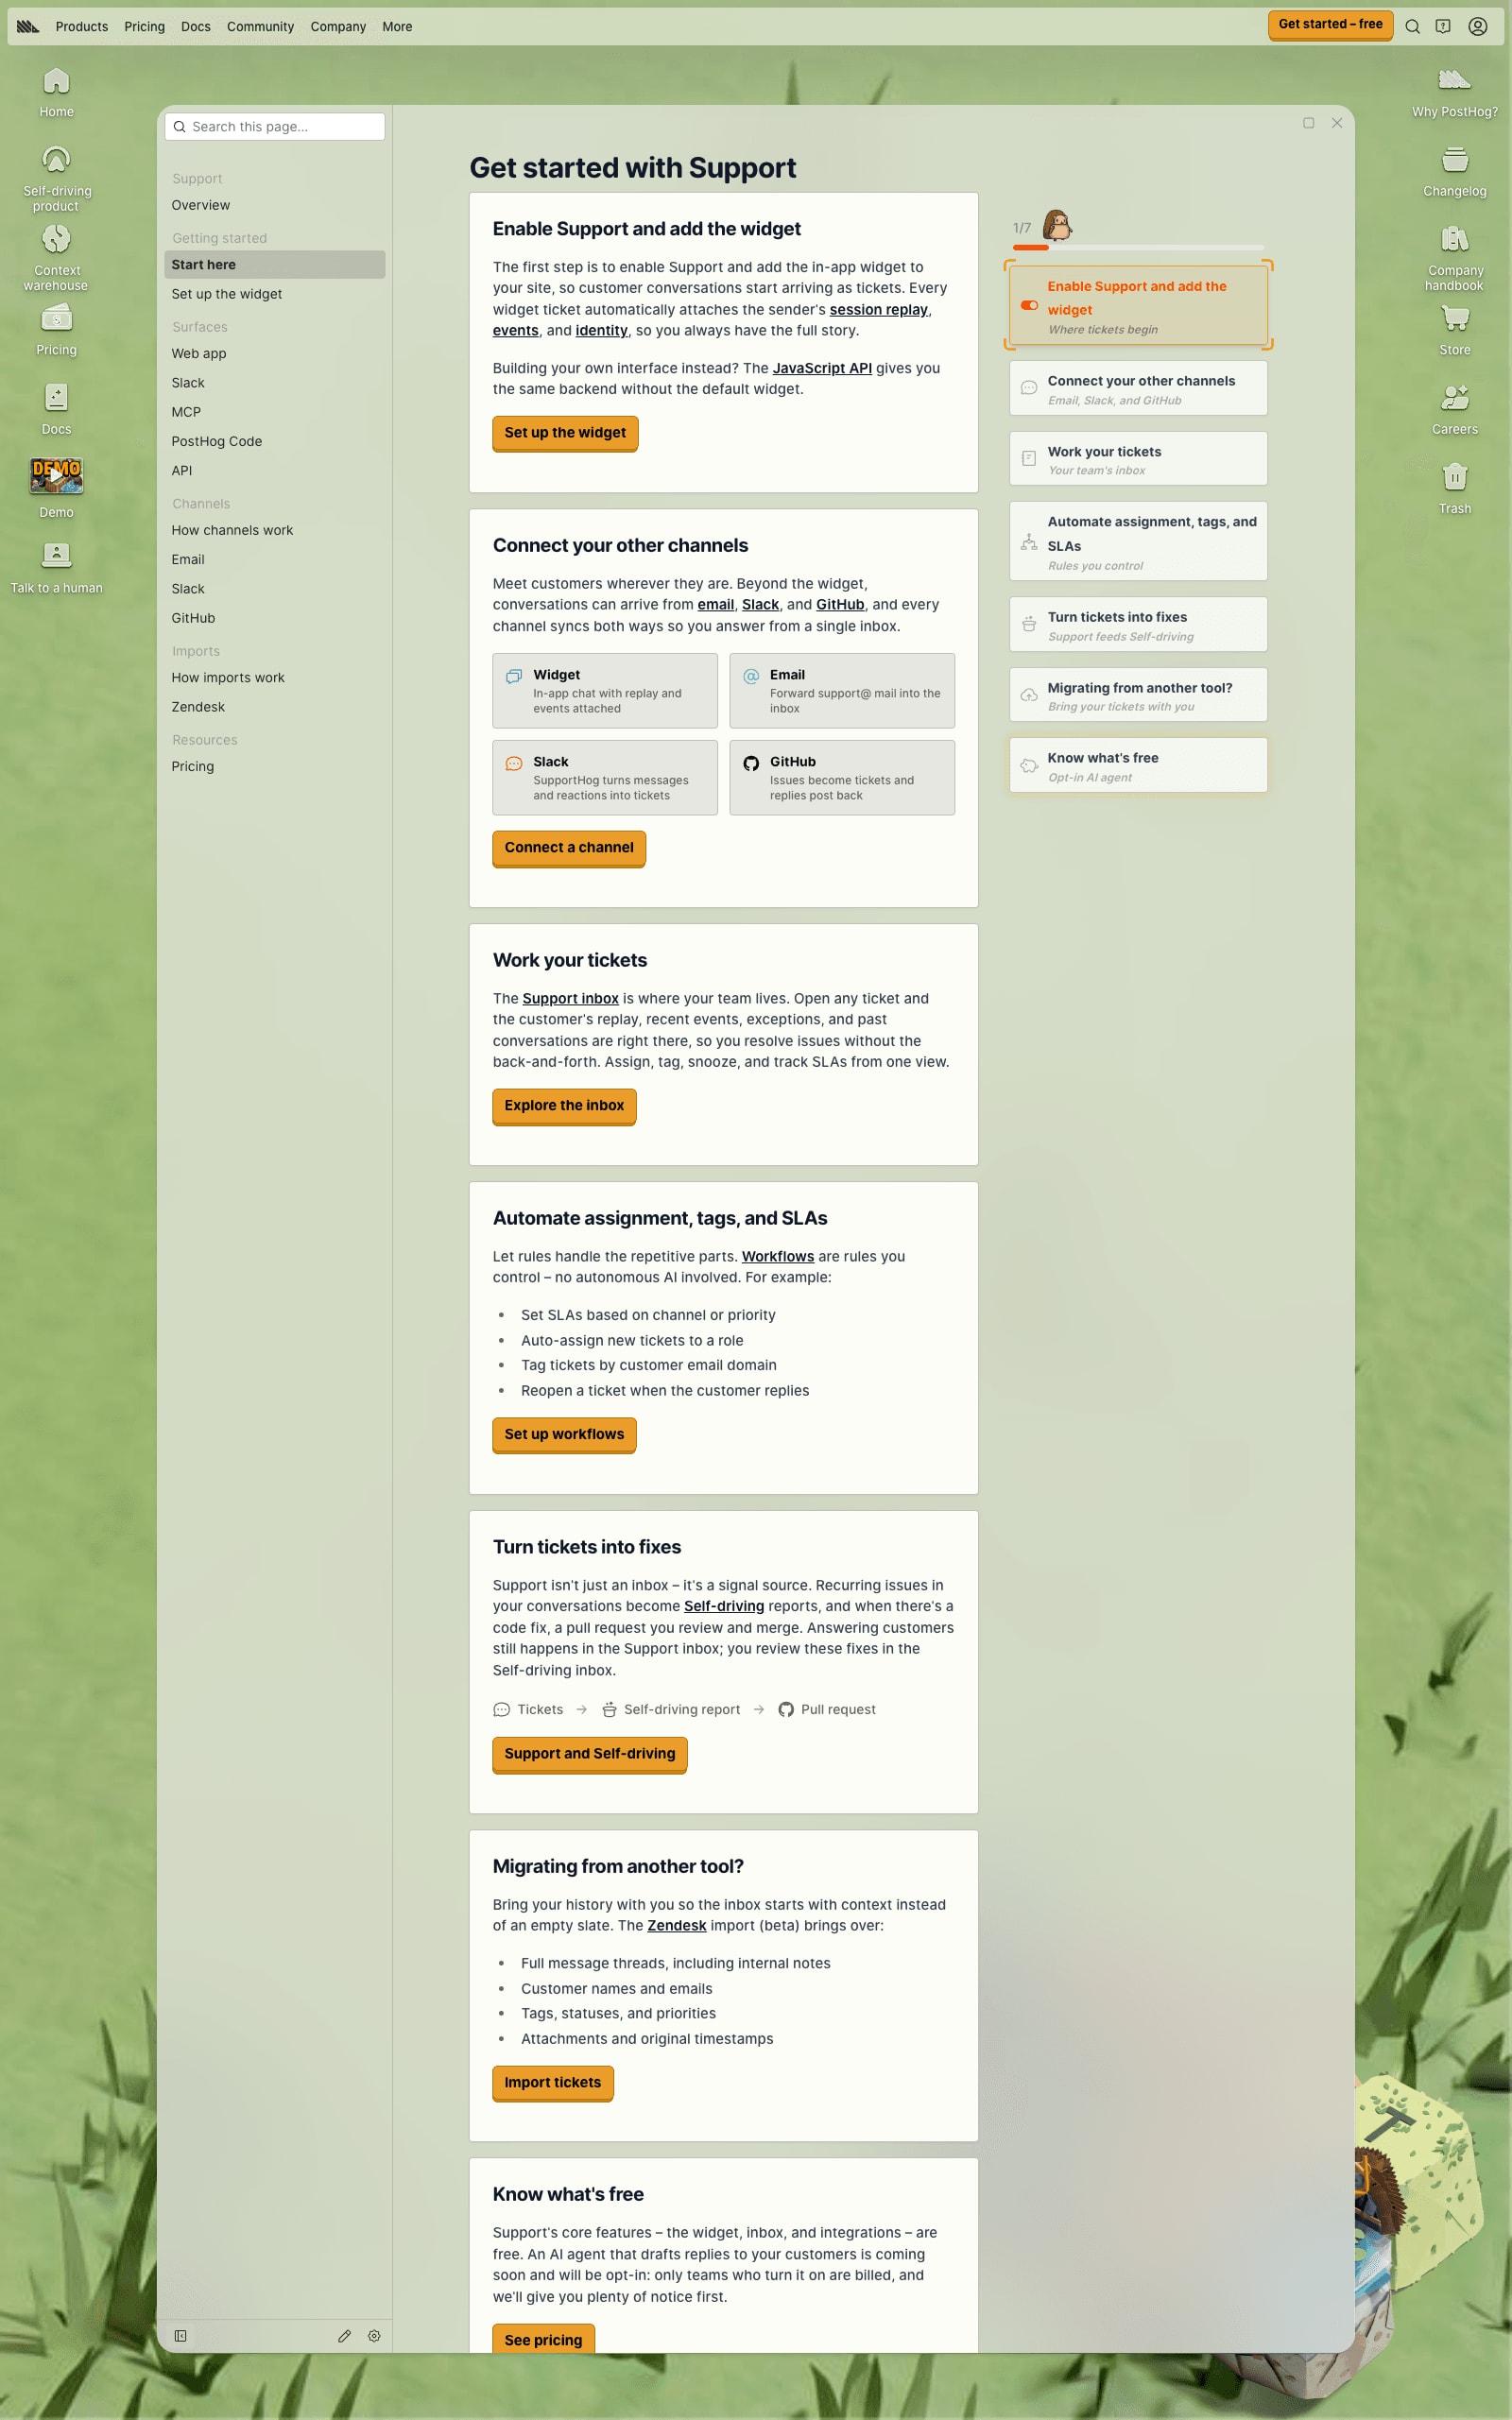
Include the following, keeping advanced details to dedicated pages in surfaces, context, or resources:
QuestLogItemsections for each adoption milestone- Screenshots and media
- Links to deeper docs
- A Use for free or pricing section at the end
Example: Support start here page
Install
Only include a dedicated installation page if your tool has an install or setup step. One page is enough for minimal setup (Support uses Set up the widget); SDK-based tools get an installation index plus a quickstart per platform.
Example: Set up the Support widget
SDK installation pages share a special architecture: they render the same content as the in-app onboarding flow, with the source of truth in the posthog/posthog monorepo pulled in automatically. The installation index auto-generates a grid of platform cards via usePlatformList(), sorted by src/navs/index.js order, with logos from each page's platformLogo frontmatter. See the onboarding docs handbook for setup.
Surfaces
Where and how people use your tool – the web app, Slack, MCP, PostHog Code, or the API. Each of these is a product (surface); there's one page per product, framed around what the user does there. This section is always called "Surfaces," and it's where AI-driven work lives now (MCP and PostHog Code are products too – there's no separate "PostHog AI" category). Name pages after the action: "Use [Tool] in/on [Product]."
Include the following pages for this section:
- One page per product (surface) your tool runs on
- What you can (and can't) do on that surface
- How the surface connects to the others
- Screenshots of the tool on that surface
Examples: Web app, Slack, MCP, PostHog Code, API
Context
This is the data that feeds your tool, and where it comes from. Unlike Surfaces, this section's name changes per tool: Support splits it into Channels (where tickets come from) and Imports (history brought in from tools like Zendesk); another tool might call it Sources, Inputs, or Signals. In-depth "How X works" explainers live here too, attached to the data they describe.
Include the following in your pages here:
- One or more top-level sections named for your tool's data sources
- A "How X works" explainer for each source or key concept
- A setup or connection guide per source
- Mermaid diagrams for data flows (use PostHog brand colors!), and tables for definitions
Examples: How channels work, Email, How imports work, Zendesk import
Resources
These are quick lookup pages and may anything standalone that doesn't fit the other categories.
Include the following pages here, as needed:
- Pricing – model, free-tier limits, how usage is calculated, and how to cut costs. Use
<SingleProductPricing>. Transparency is a differentiator for us, so be upfront. - Troubleshooting or FAQ – frequently asked questions or common issues and fixes, kept current from support tickets. Remember: if it's something that can be documented in any of the above sections, it isn't really a good FAQ/troubleshooting guide. Start with
<AskAIInput>, then searchable headings with numbered solutions. - Changelog – tool updates via
<ProductChangelog>, filtered from the main /changelog. - References – links to SDK reference docs and tool-filtered API docs.
Example: Support pricing